Course environment
Installing a Python environment
Installing Conda-Forge on Windows
This document provides a step-by-step guide to installing Conda-Forge on Windows. Conda-Forge is a community-driven collection of conda packages that are built and maintained by the community.
Step 1: Downloading Conda-Forge installer
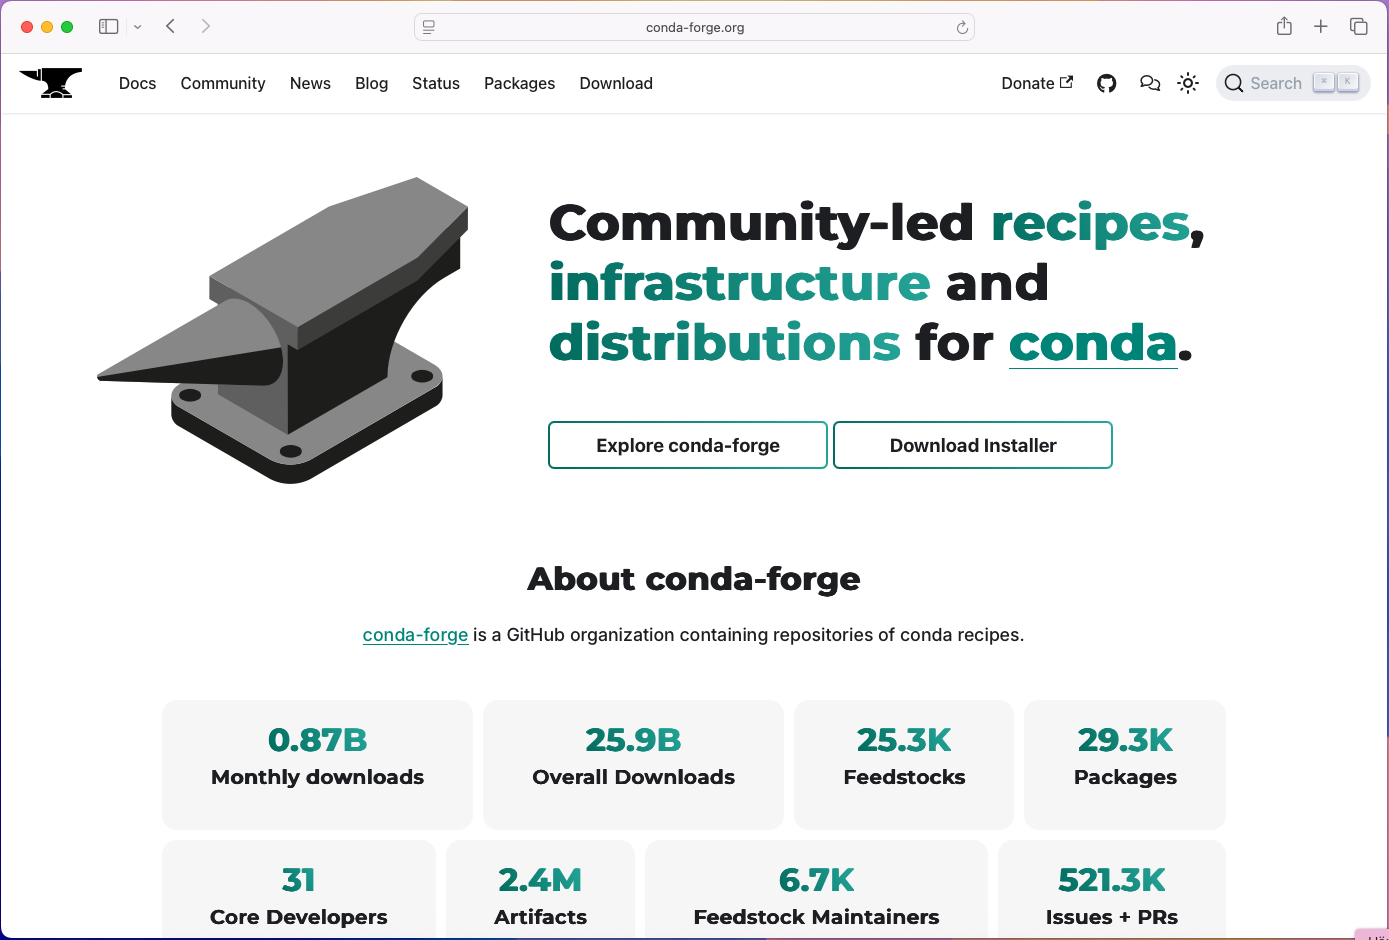
Go to the Conda-Forge page and download the Anaconda installer for Windows.

Click on the button Download Installer.

Click on the Windows Button to download the installer for Windows.
A download message will appear on the top right corner of your browser. Click on the Open file when the download has completed.

Step 2: Installing Conda-Forge
When the installer opens, you will see a welcome screen.

Click on Next to continue. The following page will be displayed:

Select the option Install only for me and click on Next. The following page will be displayed:

Leave the suggested location for the installation and click on Next. The following page will be displayed:

Here it is important to select the option “Register Anaconda as my default Python 3.x”. This will ensure that the Conda-Forge packages are available in your Python environment. Click on Next to continue. The installation of Conda-Forge will start and the following page will be displayed:
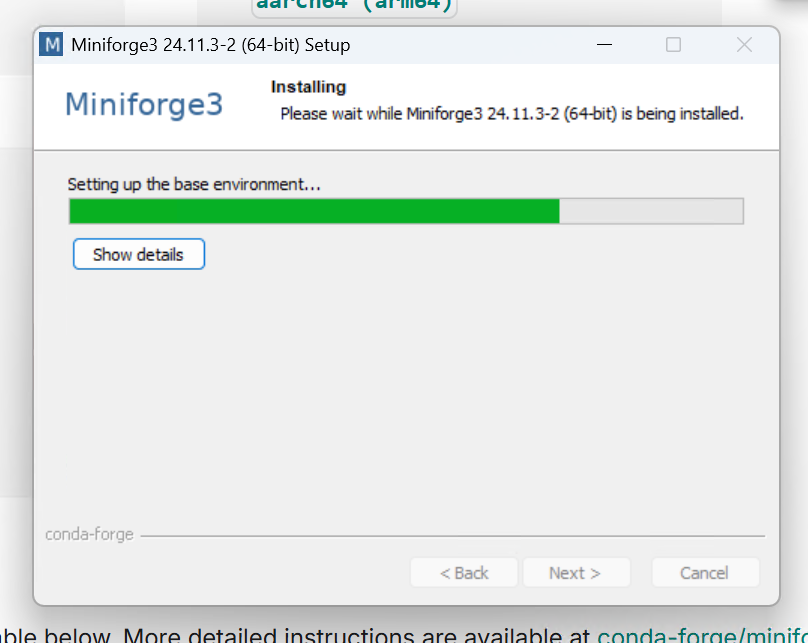
When this dialog has finished the Conda-Forge installation is complete.
Step 3: Opening an Conda-prompt
Press the Start button in Windows. This should bring up the following menu.
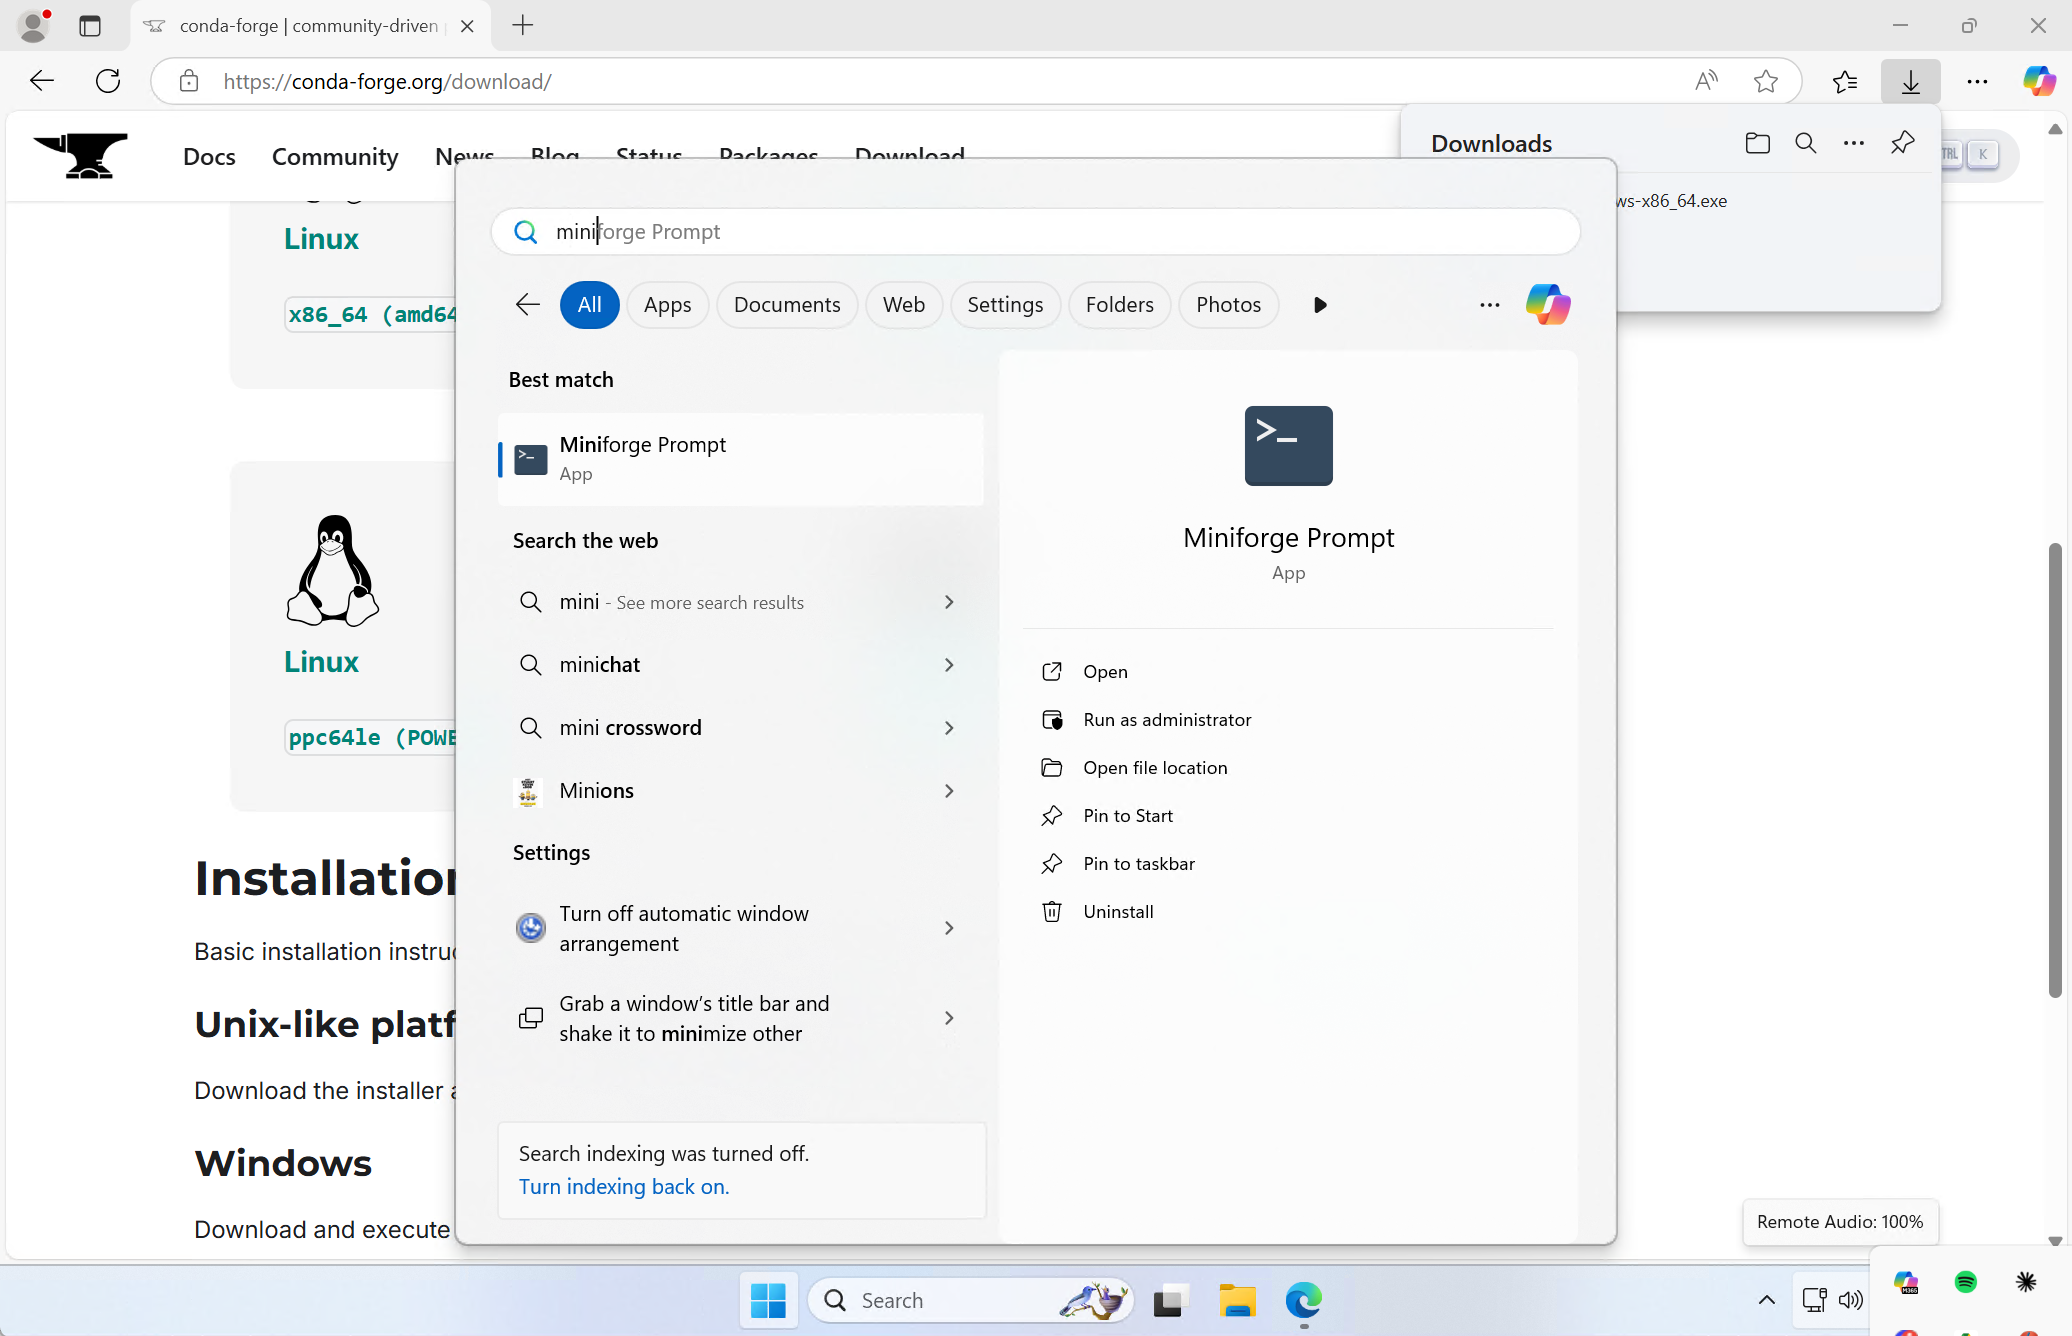
In the top part of the start menu enter miniforge. This should show the shortcut for the Miniforge prompt. Click on the Miniforge Prompt to open a command line window as shown below:

To install the required packages for this course we create an environment. An environment is a self-contained installation of Python with its own set of packages. This allows you to have multiple versions of Python and packages installed on your system without conflicts. To create an environment called compute-env with Python 3.8, run the following command in the Miniforge prompt:
conda create -n compute-env python=3.13 numpy scipy matplotlib qtpy pyqt
Running this command will check for the required packages and their dependencies. If everything is ok, you will be prompted to confirm the installation. Type y and press enter to continue.

When the installation completes, you will see the following message:
Downloading and Extracting Packages:

Preparing transaction: done
Verifying transaction: done
Executing transaction: done
#
# To activate this environment, use
#
#     $ conda activate compute-env
#
# To deactivate an active environment, use
#
#     $ conda deactivate
To use this environment in the future, you need to activate it. To do this, run the following command in the Miniforge prompt:
conda activate compute-env
This will activate the compute-env environment and you will see the following message:
(compute-env) C:\Users\YourUsername>
This indicates that you are now in the compute-env environment and any packages you install or run will be from this environment. To deactivate the environment, run the following command:
conda deactivate
This will deactivate the compute-env environment and return you to the base environment.
Step 5: Installing Visual Studio Code
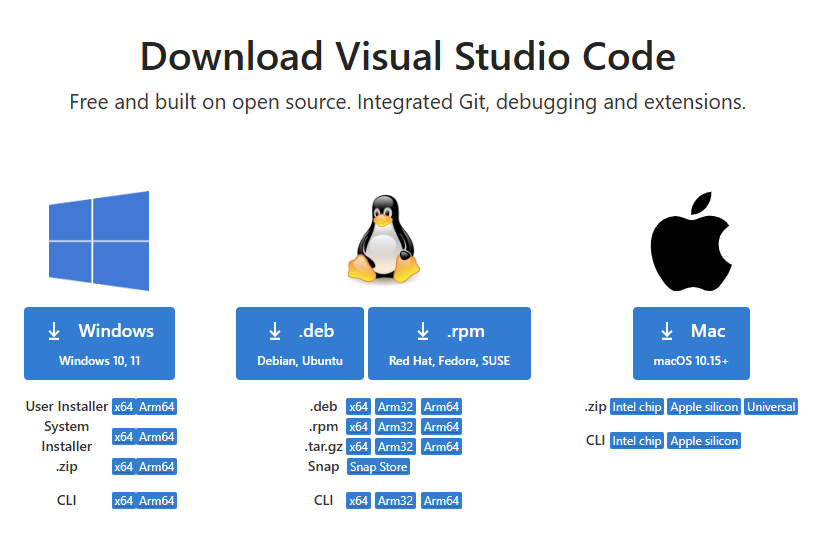
Download Visual Studio Code from here:
https://code.visualstudio.com/Download
Click on the open file when the download has completed.
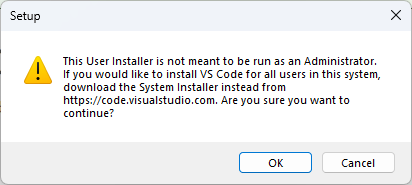
When running the installer the first time it will show a warning that the installer is not meant to be run as an administrator. This is OK. Press OK to continue.
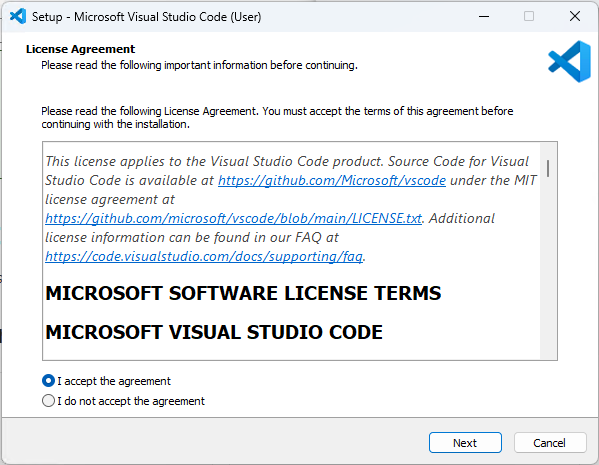
A welcom page is shown asking you to accept the license agreement. Press I accept the agreement and click on Next.
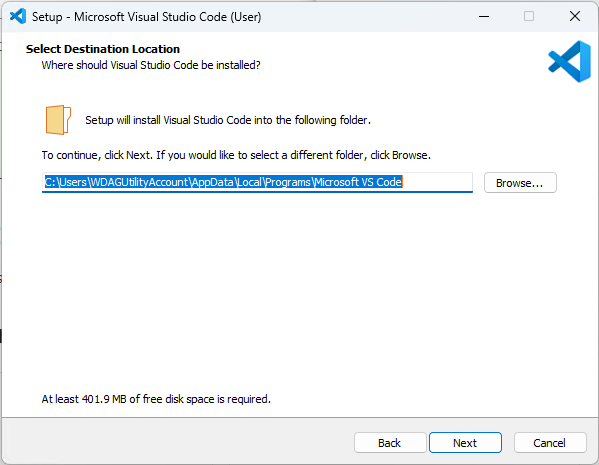
Next a page is shown where you can select the installation folder. Leave the default folder and click on Next.
In the next page just accept the default name of the shortcut to be created. Click on Next.

In the next page it is important that you select all checkboxes. This will ensure that Visual Studio Code is added to the PATH and that the file types are associated with Visual Studio Code. Click on Next.

Click on Install to start the installation.

When the installation is complete, you will see the following message:

Leave the checkbox Launch Visual Studio Code checked and click on Finish. This will start Visual Studio Code.
Step 6: Installing the Python extension for Visual Studio Code
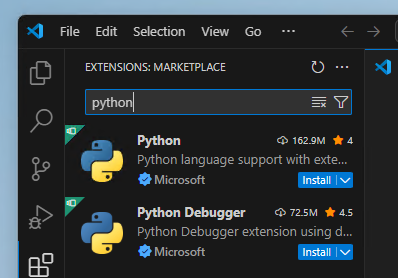
I the left toolbar click on the Extensions icon. This will open the extensions view.

In the search box enter Python. This will show the Python extension for Visual Studio Code. Click on the Install button to install the extension.
Next, create a new file by clicking on the File/New file… in the menu. This will open a file type selection dialog.

In the file type selection dialog select Python. This will create a new Python file.
In the next step we will need to select the Python interpreter. This is the Python version that will be used to run the code. To select the Python interpreter, click on the Select interpreter icon in the bottom right corner of Visual Studio Code.

This will open a list of available Python interpreters. Select the one that corresponds to the compute-env environment we created earlier. This should be something like C:UsersYourUsernameMiniforge3envscompute-envpython.exe.

When this has been done, everytime you open a Python file in Visual Studio Code, it will show a play button in the top right corner. This will run the code in the file using the selected Python interpreter. Below shows what happens when you click on the play button.

Installing Conda-Forge on macOS / Linux
This document provides a step-by-step guide to installing Conda-Forge on macOS. Conda-Forge is a community-driven collection of conda packages that are built and maintained by the community.
Step 1: Downloading Conda-Forge installer
Go to the Conda-Forge page and download the Anaconda installer for Windows.
Click on the button Download Installer.

In this step it is important to now if you are using a Intel- or Apple Silicon Mac. If you are using a Intel Mac, click on the macOS Button to download the installer for Intel Macs. If you are using an Apple Silicon Mac, click on the Apple Silicon Button to download the installer for Apple Silicon Macs.
Step 2: Installing Conda-Forge
When the download completed the installation needs to be completed in a Terminal. To open a Terminal, press Command + Space and type in Terminal. This will open the Terminal application.
In the terminal we need to navigate to the folder where the installer was downloaded. By default, this is the Downloads folder. To navigate to the Downloads folder, run the following command in the terminal:
cd ~/Downloads
We are now ready to start the installer. The installer is a .sh file. To start the installation, run the following command in the terminal:
sh Miniforge3-MacOSX-arm64.sh

When the installer starts it shows the license agreement. To accept the license agreement, we need to move down in the text. To do this, press the Space key until the end of the license agreement is reached. After that, type in yes and press Enter to accept the license agreement.

Next you will be asked where to install Conda-Forge. By default, it will be installed in the home directory under the folder miniforge3. To accept the default location, press Enter. If you want to change the location, type in the new location and press Enter.
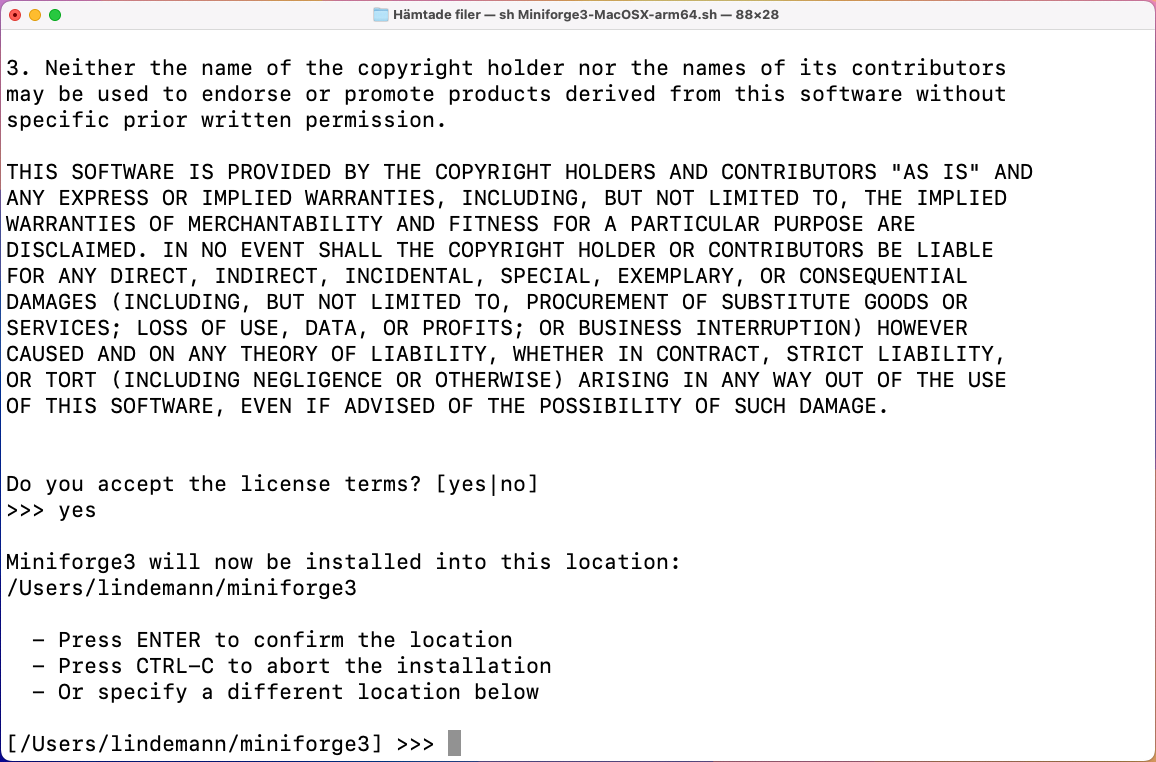
The installer now downloads the required packages. Finally it asks if you would like to configure the shell to use conda by default. This is recommended, so type in yes and press Enter.

The installation is now complete. Before we use the Conda-Forge, we need to restart the terminal. To do this, close the terminal and open it again.
The new terminal should look like this:

That is there should be a prompt with (base) in front of it. This indicates that the Conda-Forge is installed and ready to use.
Step 3: Creating an environment for this course
In the opened terminal we need to create a new environment for this course. An environment is a self contained Python installation with a set of packages. To create a new environment, run the following command in the terminal:
conda create -n compute-env python=3.13 numpy scipy matplotlib qtpy pyqt
This will create a new environment called compute-env with Python 3.12 and the packages numpy, scipy, matplotlib, qtpy and pyqt. The command will also install all the dependencies required for these packages.

At some point during the installation, you will be asked if you want to proceed with the installation. Type in y and press Enter to proceed with the installation.
When the installation is complete, you will see a message indicating that the environment has been created and how to activate it.

To continue our installation with the packages required for this course, we need to activate the environment. To do this, run the following command in the terminal:
conda activate compute-env
This will activate the environment and change the prompt to indicate that the environment is active. The prompt should now look like this:
(compute-env) user@computer:~$
Step 4: Testing the installation
To test the installation, will open a Python interpreter. To do this, run the following command in the terminal:
python
This will open the Python interpreter. The prompt should now look like this:
>>>
On this prompt we type in the following command to import CALFEM:
>>> import numpy as np
This should return without any error messages. To get some information about the installed version of numpy, type in the following command:
Step 5: Installing Visual Studio Code
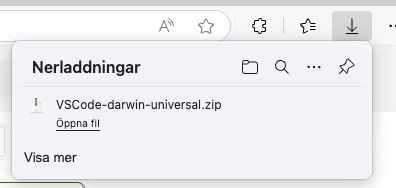
To install Visual Studio Code, go to the Visual Studio Code page and download the installer for macOS. Clicking on the Mac download button should automatically select the correct version for your system.
The download comes in the form of a .zip file.
Open the Downloads folder. It should look like this:
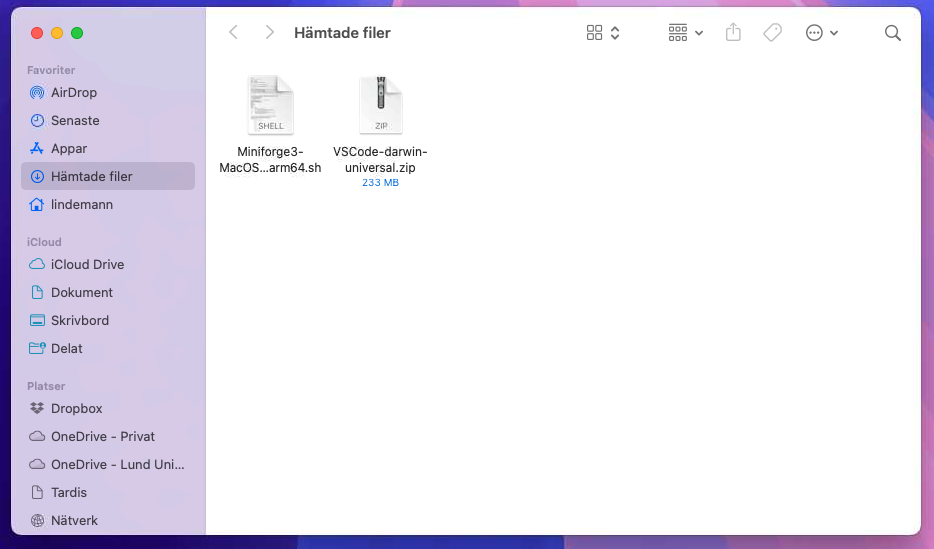
Double click on the downloaded file. This will extract the contents of the zip file. You should see a new icon called Visual Studio Code.

Drag the Visual Studio Code icon to the Applications folder. This will copy the application to the Applications folder.
To open Visual Studio Code, go to the Applications folder and double click on the Visual Studio Code icon. You can also search for Visual Studio Code in the Spotlight search by pressing Command + Space and typing in Visual Studio Code.

When you open Visual Studio Code for the first time, you will see a welcome screen. You can close this screen by clicking on the X in the top right corner.
Step 6: Installing the Python extension for Visual Studio Code
I the left toolbar click on the Extensions icon. This will open the extensions view.
In the search box enter Python. This will show the Python extension for Visual Studio Code. Click on the Install button to install the extension.
Next, create a new file by clicking on the File/New file… in the menu. This will open a file type selection dialog.
In the file type selection dialog select Python. This will create a new Python file.
In the next step we will need to select the Python interpreter. This is the Python version that will be used to run the code. To select the Python interpreter, click on the Select interpreter icon in the bottom right corner of Visual Studio Code.
This will open a list of available Python interpreters. Select the one that corresponds to the compute-env environment we created earlier. This should be something like C:UsersYourUsernameMiniforge3envscompute-envpython.exe.
When this has been done, everytime you open a Python file in Visual Studio Code, it will show a play button in the top right corner. This will run the code in the file using the selected Python interpreter. Below shows what happens when you click on the play button.
Software environment for this course (Windows)
The required software for this course can be installed using conda-forge with the following command:
conda create -n compute-env-v4 python=3.13 numpy scipy matplotlib qtpy pyside6 meson ninja m2w64-gcc-fortran libpython jupyter
Software environment for this course (macOS / Linux)
The required software for this course can be installed using conda-forge with the following command:
conda create -n compute-env-v4 python=3.13 numpy scipy matplotlib qtpy pyside6 meson ninja gcc_linux-64 libpython jupyter
Running Python code
Python is a script language and Python code can be run in many different ways. This chapter will try to cover all the ways you can run your Python code.
Executing code from the command line (python)
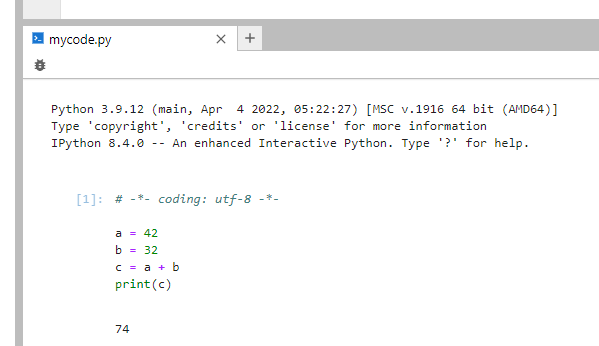
All Pytho installations comes with an interpreter for Python. This is a command line tool that can be used to execute Python code. Just running the interpreter without any arguments starts an interactive Python prompt as shown below:
(base) C:\Users\jonas>python
Python 3.9.7 (default, Sep 16 2021, 16:59:28) [MSC v.1916 64 bit (AMD64)] :: Anaconda, Inc. on win32
Type "help", "copyright", "credits" or "license" for more information.
>>>
The >>> is the Python interactive prompt. Here you can enter python commands and functions directly. In the following example 3 python variables are created and finally the variable c is printed.:
>>> a = 42
>>> b = 32
>>> c = a + b
>>> print(c)
74
Using the Python interactive shell enables you to do experiment with Python interactively. To exit the interpreter press Ctrl-Z.
Running Python source files (.py)
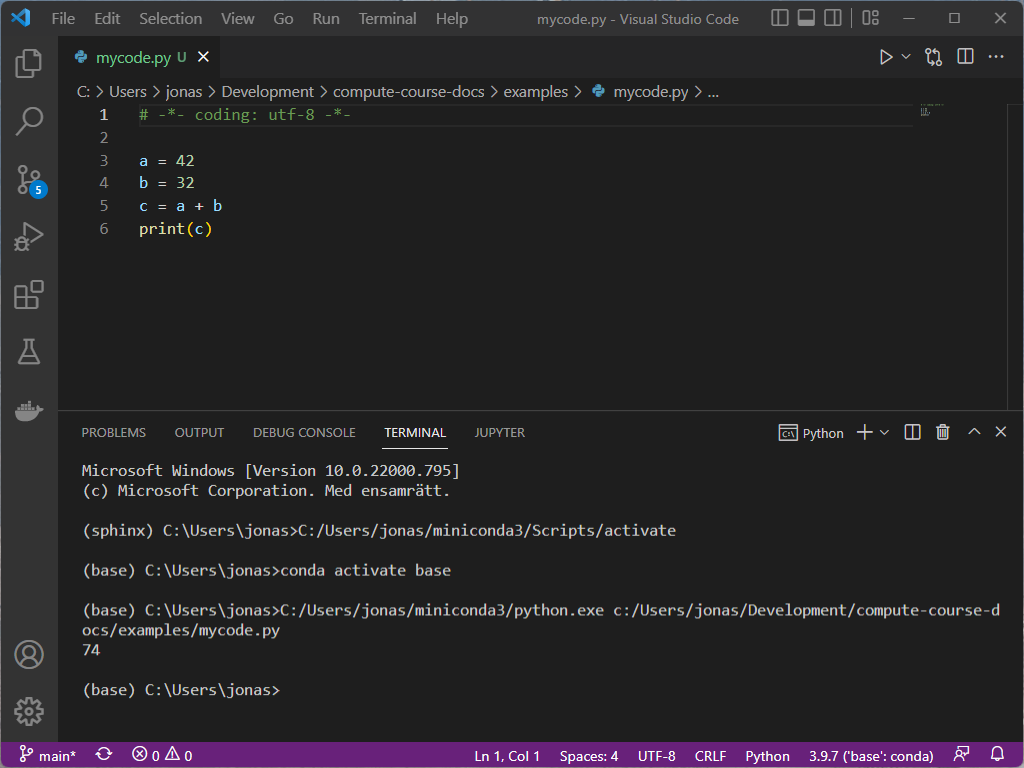
The interpreter can also execute Python code from text files, usually with the .py extension. The code shown in the interactive example can be put in a source file, mycode.py, with the following content:
# -*- coding: utf-8 -*-

a = 42
b = 32
c = a + b
print(c)
The first line is not required, but tells Python that the source code can contain unicode characters (öäå). This source file can then be executed by calling the python command with the Python source file as the first argument.:
(base) C:\Users\jonas\Development\compute-course-docs\examples>python mycode.py
74
Running Python source files in Visual Studio Code
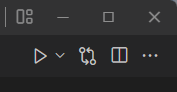
When the Python-plugins has been installed in Visual Studio Code (VSCode) it is possible to run Python-source files directly in the application. If a Python source file is open a special toolbar is shown in the top right corner with a play-button as shown in the followin figure:
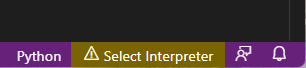
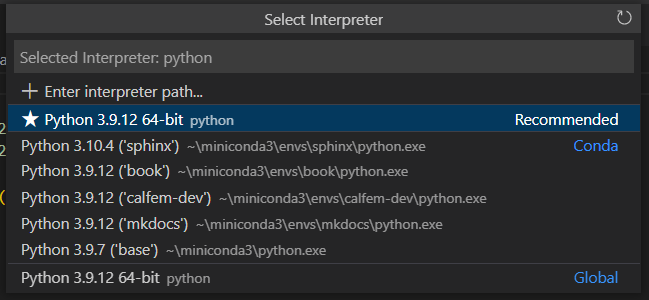
Before we can runt the source file in VSCode, the correct Python interpreter must be selected. Selecting a Python interpreter is done by clicking in the status bar in the lower right corner of the window.
This brings up a list of all the installed Python interpreters. Select the one you want to use. The default Anaconda interpreter is prefixed with (base).
When an interpreter has been selected it is now possible to execute the Python source by clicking the play-button. This will open an output pane in VSCode and show execution and output from the execution of the source file.
Running Python source files in Spyder
Spyder is the default development environment that comes with the Anaconda distribution. Spyder uses the default Python interpreter in the base environment of the Anaconda distribution.
Running a Python source file in Spyder is done by opening it using File/Open.. menu and choosing Run/Run menu. It is also possible to use the function key F5 directly. This executes the source file and shows the output in the Console tab in the lower right of the window.
Spyder always asks you where you want to execute the Python file, by displaying the following dialog:
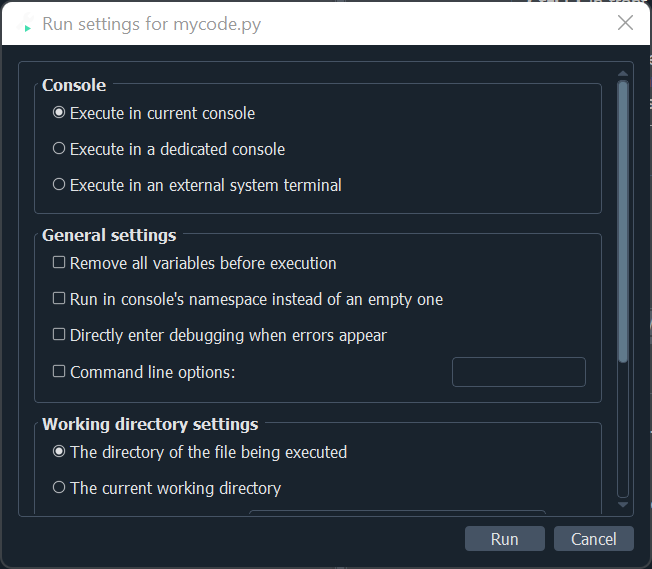
By default is uses the Python interpreter running in the Console-tab in the lower right. The second option is running in a dedicated console. This alternative will start a new Python interpreter running in a separate tab. The third option is to run in an external terminal. As Spyder is also a Python application it can sometimes be beneficial to run your code outside the Spyder environment. This is especially important when developing graphical user interface applications (PyQt).
When running in the default console it can be a good idea to check the option Remove all variables before execution, otherwise all existing variables from the last run are kept.
If there where no errors the output is shown in the console tab.

Running Jupyter-notebooks
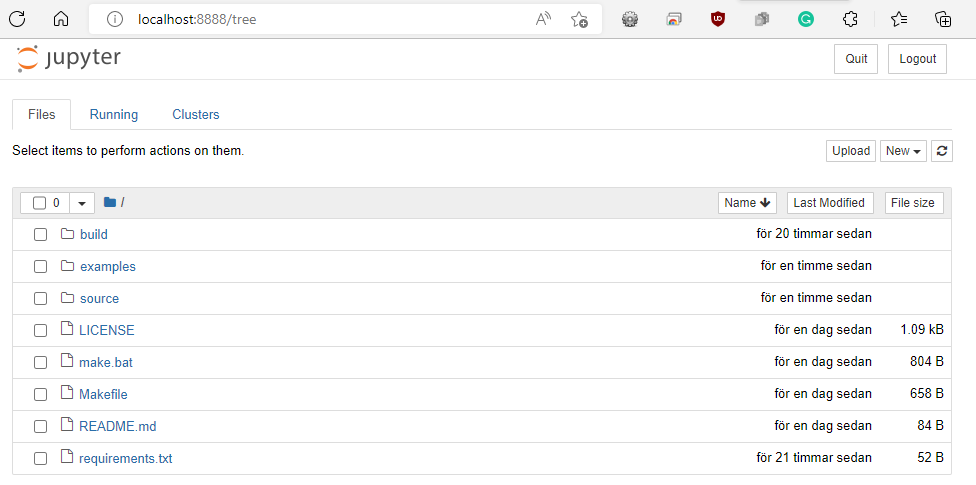
Another way to run Python code is to use Jupyter-Notebooks. In the Anaconda distribution a notebook can be started using the jupyuter-notebook command. This will start a notebook web server running on your local computer. The url will to access the server is displayed in the output from the command:
(base) C:\Users\jonas\Development\compute-course-docs>jupyter-notebook
[I 10:39:47.869 NotebookApp] Writing notebook server cookie secret to C:\Users\jonas\AppData\Roaming\jupyter\runtime\notebook_cookie_secret
...
[C 10:39:48.772 NotebookApp]

    To access the notebook, open this file in a browser:
        file:///C:/Users/jonas/AppData/Roaming/jupyter/runtime/nbserver-19148-open.html
    Or copy and paste one of these URLs:
        http://localhost:8888/?token=089...88
    or http://127.0.0.1:8888/?token=089...88
In most cases the jupyter-notebook-command will try to open the url automatically in your browser. The server can be stopped by clicking Ctrl-C multiple times.
There is a second command that starts a more advanced notebook server, jupyter-lab:
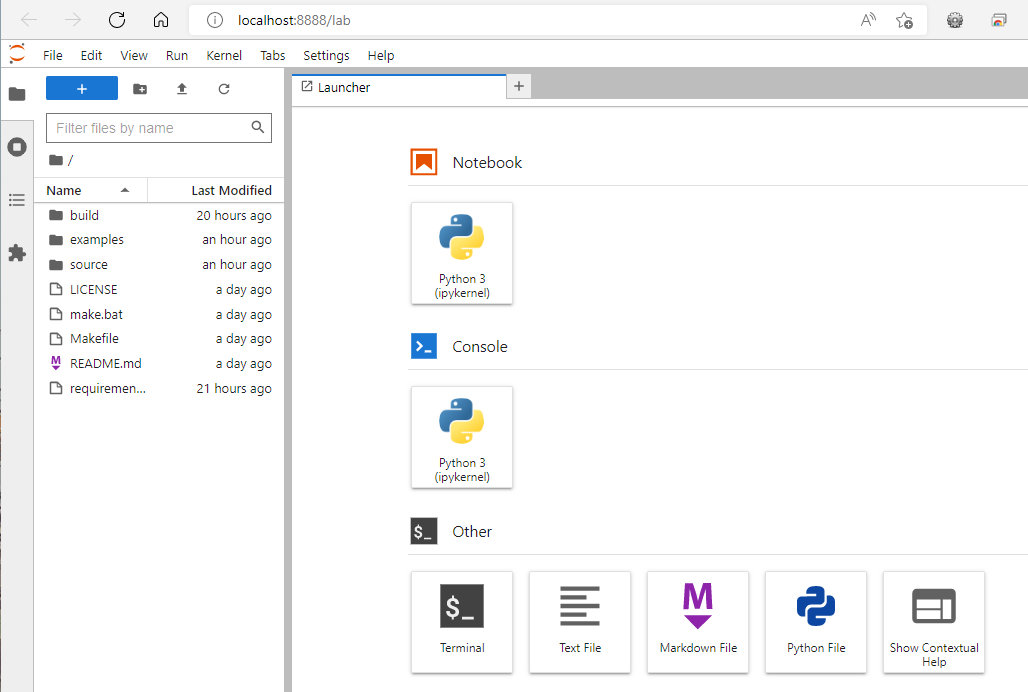
The jupyter-lab server can also be used to edit and run python source files (.py). To do this you have to open the source file and create a Python console/interpreter for the opened editor. To do this, right-click in the editor window and select Create Console for Editor.
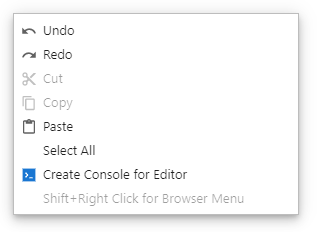
This brings up a dialog asking for what kind of Python interpreter you want:
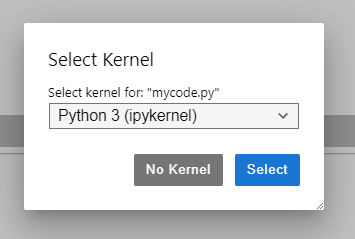
Click Select to continue. This opens up a lower pane with the started interpreter. To run code select Run/Run All code from the menu in Jupyter-lab.
How to use Python virtual environments
Python can use a lot of third-party extension modules. Complex projects can depend on a lot of these modules. Installing extension modules in the base installation can work for smaller projects and scripts. However different projects can have dependencies on different incompatible libraries, making it hard to maintain an single Python installation for multiple projects. To solve this, Python contains a mechanism for creating isolated python environments that each can have it’s own set of extension modules installed. This mechanics is called virtual environments and is accessible through the venv module.
A virtual environment contains is a copy of the Python base installation with only the absolute minimum of installed packages.
Using a virtual enviromnents (venv)
Creating a virtual environment is done by the following command:
python -m venv myenv
This will create a separate directory, myenv, where copy of the Python base install will be installed. To use this new environment it has to be activated. This is done by calling/sourcing a special script that is available inside the environment, activate. On a windows installation a virtual environment is activated by calling:
myenv\Scripts\activate.bat
On a Linux/Mac environment the environment is activated by sourcing:
source myenv/bin/activate
When an enviromnent is activte the prompt is changed to display the currently active environment:
(myenv) (base) E:\Users\Jonas\Development\python_dev_doc\examples>
If the environment is no longer used it can be deactivated using the following commands:
myenv\Scripts\deactivate.bat
On a Linux/Mac environment the environment is activated by sourcing:
source myenv/bin/deactivate
Managing packages in virtual environment
Packages or third-party packages in a virtual environment are installed and managed using the pip command just like in a base Python installation. The difference is that a newly created environment only holds just the required packages for the environment to work.
Available packages in an enviromnent can be listed using the pip list command:
$ pip list
Running this command in a base installation will produce a long list of packages:
$ pip list
Package                            Version
---------------------------------- -------------------
alabaster                          0.7.12
anaconda-client                    1.7.2
anaconda-navigator                 2.0.3
anaconda-project                   0.9.1
anyio                              2.2.0
appdirs                            1.4.4
argh                               0.26.2
argon2-cffi                        20.1.0
asn1crypto                         1.4.0
astroid                            2.5
astropy                            4.2.1
async-generator                    1.10
atomicwrites                       1.4.0
attrs                              20.3.0
autopep8                           1.5.6
Babel                              2.9.0
Doing the same thing in a newly created environment produces the following output.
pip list
Package    Version
---------- -------
pip        20.2.3
setuptools 49.2.1
Using virtualenv to create environments
virtualenv is a tool that provides additional options and also makes it easier to create virtual environments. This should preferable be installed in the base Python installation. The tool is installed using the following command:
pip install virtualenv
Creating reproducable environments
In many scientific workflows it is important to create reproducable workflows. This also extends to scientific software. Virtual environments are excellent to create a reproducable set of dependencies for a scientific workflow.
When a environment has been created and packages have been installed, it is possible to create a list of required packages that can be used to recreate the excact environment. Using the pip freeze command it is possible to create a list of requirements that can be used as input in a pip install command.
In the following example we will create a requirements.txt file containing the needed modules in the myenv environment. Listing the installed packages produces the following output:
$ pip list
Package           Version
----------------- -------
calfem-python     3.5.10
cycler            0.10.0
gmsh              4.8.4
kiwisolver        1.3.1
matplotlib        3.4.3
numpy             1.21.2
Pillow            8.3.1
pip               21.2.4
PyOpenGL          3.1.5
pyparsing         2.4.7
PyQt5             5.15.4
PyQt5-Qt5         5.15.2
PyQt5-sip         12.9.0
PyQtWebEngine     5.15.4
PyQtWebEngine-Qt5 5.15.2
python-dateutil   2.8.2
PyVTK             0.5.18
scipy             1.7.1
setuptools        49.2.1
six               1.16.0
visvis            1.13.0
wheel             0.37.0
Using the pip freeze command we can create a list of requirements.
$ pip freeze > requirements.txt
$ cat requirements.txt
calfem-python==3.5.10
cycler==0.10.0
gmsh==4.8.4
kiwisolver==1.3.1
matplotlib==3.4.3
numpy==1.21.2
Pillow==8.3.1
PyOpenGL==3.1.5
pyparsing==2.4.7
PyQt5==5.15.4
PyQt5-Qt5==5.15.2
PyQt5-sip==12.9.0
PyQtWebEngine==5.15.4
PyQtWebEngine-Qt5==5.15.2
python-dateutil==2.8.2
PyVTK==0.5.18
scipy==1.7.1
six==1.16.0
visvis==1.13.0
On Windows use type requirements.txt.
Using this file it is now possible to recreate a new environment using the following commands:
$ python -m venv newenv
$ newenv/Scripts/activate.bat
(newenv) $ pip install -r myenv\requirements.txt
Collecting calfem-python==3.5.10
Using cached calfem_python-3.5.10-py3-none-any.whl (70 kB)
Collecting cycler==0.10.0
...
Successfully installed Pillow-8.3.1 PyOpenGL-3.1.5 PyQt5-5.15.4 PyQt5-Qt5-5.15.2 PyQt5-sip-12.9.0 PyQtWebEngine-5.15.4 PyQtWebEngine-Qt5-5.15.2 PyVTK-0.5.18 calfem-python-3.5.10 cycler-0.10.0 gmsh-4.8.4 kiwisolver-1.3.1 matplotlib-3.4.3 numpy-1.21.2 pyparsing-2.4.7 python-dateutil-2.8.2 scipy-1.7.1 six-1.16.0 visvis-1.13.0
If we activate and list the packages we should get the same packages in newenv as in myenv.
$ pip list
Package           Version
----------------- -------
calfem-python     3.5.10
cycler            0.10.0
gmsh              4.8.4
kiwisolver        1.3.1
matplotlib        3.4.3
numpy             1.21.2
Pillow            8.3.1
pip               20.2.3
PyOpenGL          3.1.5
pyparsing         2.4.7
PyQt5             5.15.4
PyQt5-Qt5         5.15.2
PyQt5-sip         12.9.0
PyQtWebEngine     5.15.4
PyQtWebEngine-Qt5 5.15.2
python-dateutil   2.8.2
PyVTK             0.5.18
scipy             1.7.1
setuptools        49.2.1
six               1.16.0
visvis            1.13.0
We now have an exact copy of the myenv environment. This can be useful to recreate the requiremenets for a scientific software package on a different system or resource.
Using pipenv to manage environments and packages
virtualenv, venv and pip are essential tools for creating a reproducable environment for Python applications. However, they are separate tools which require many manual steps to setup a working environment for an application.
Pipenv is a tool that combines package and environment creation in a single tool and automatically handles requirements.
Advantages with Pipenv are:
Single tool to manage packages and virtual environments
Better handling of requirements
Everything is hashed to ensure security.
Make sure the latest packages are used.
Installing pipenv
Pipenv can be installed using the following commands:
$ pip install pipenv
It can also be installed in your home directory using:
$ pip install --user pipenv
Setting up a pipenv project
Pipenv is best used in a project setting. That is all project related source code and files are located in a single directory. This directory will be the base for the Pipenv environment and package data. An example of how to setup a project with Pipenv is shown below:
$ mkdir myproj
$ cd myproj
$ pipenv install

Creating a virtualenv for this project...
Pipfile: E:\Users\Jonas\Development\python_dev_doc\examples\myproj\Pipfile
Using E:/Program Files (x86)/Microsoft Visual Studio/Shared/Python37_64/python.exe (3.7.8) to create virtualenv...
[   =] Creating virtual environment...created virtual environment CPython3.7.8.final.0-64 in 4414ms
creator CPython3Windows(dest=C:\Users\Jonas Lindemann\.virtualenvs\myproj-jNDwD6z3, clear=False, no_vcs_ignore=False, global=False)
seeder FromAppData(download=False, pip=bundle, setuptools=bundle, wheel=bundle, via=copy, app_data_dir=C:\Users\Jonas Lindemann\AppData\Local\pypa\virtualenv)
    added seed packages: pip==21.1.3, setuptools==57.4.0, wheel==0.36.2
activators BashActivator,BatchActivator,FishActivator,PowerShellActivator,PythonActivator,XonshActivator

Successfully created virtual environment!
Virtualenv location: C:\Users\Jonas Lindemann\.virtualenvs\myproj-jNDwD6z3
Creating a Pipfile for this project...
Pipfile.lock not found, creating...
Locking [dev-packages] dependencies...
Locking [packages] dependencies...
Updated Pipfile.lock (a65489)!
Installing dependencies from Pipfile.lock (a65489)...
================================ 0/0 - 00:00:00
To activate this project\'s virtualenv, run pipenv shell.
Alternatively, run a command inside the virtualenv with pipenv run.
Please note that on Windows it used the default Python installation on your system and not the Python interpreter in the PATH. If you want to build the environment using a specific Python interpreter use the following command instead:
$ pipenv --python [path to python interpreter] install
This will create 2 files in the project directory. A Pipfile and a Pipfile.lock. The Pipfile contains the dependencies for the project and the Pipfile.lock contains the latest tested combination of packages.
A typical Pipfile is shown below:
[[source]]
url = "https://pypi.org/simple"
verify_ssl = true
name = "pypi"

[packages]
calfem-python = "*"

[dev-packages]

[requires]
python_version = "3.8"
Installing packages
Packages can be installed in the project using the pipenv install command. In the following command we install the calfem-python package in the current pipenv project.
$ cd myproj
$ pipenv install calfem-python

Installing calfem-python...
Adding calfem-python to Pipfile\'s [packages]...
Installation Succeeded
Pipfile.lock (db4242) out of date, updating to (656452)...
Locking [dev-packages] dependencies...
Locking [packages] dependencies...
        Building requirements...
Resolving dependencies...
Success!
Updated Pipfile.lock (656452)!
Installing dependencies from Pipfile.lock (656452)...
================================ 0/0 - 00:00:00
To activate this project\'s virtualenv, run pipenv shell.
Alternatively, run a command inside the virtualenv with pipenv run.
This will add calfem-python to the
Running a project using pipenv
We now have a project that can use the calfem-python moduel with all its dependencies. We now create a main python file, fea_analysis.py in our project directory with the following contents:
import numpy as np
import calfem.core as cfc

# ----- Topology -------------------------------------------------

Edof = np.array([
    [1, 2, 3, 4, 5, 6],
    [4, 5, 6, 7, 8, 9],
    [7, 8, 9, 10, 11, 12]
])

# ----- Stiffness matrix K and load vector f ---------------------

K = np.mat(np.zeros((12,12)))
f = np.mat(np.zeros((12,1)))
f[4] = -10000.

# ----- Element stiffness matrices  ------------------------------

E = 2.1e11
A = 45.3e-4
I = 2510e-8
ep = np.array([E,A,I])
ex = np.array([0.,3.])
ey = np.array([0.,0.])

Ke = cfc.beam2e(ex,ey,ep)

print(Ke)

# ----- Assemble Ke into K ---------------------------------------

K = cfc.assem(Edof,K,Ke);

# ----- Solve the system of equations and compute support forces -

bc = np.array([1,2,11])
(a,r) = cfc.solveq(K,f,bc);

# ----- Section forces -------------------------------------------

Ed=cfc.extractEldisp(Edof,a);

es1, ed1, ec1 = cfc.beam2s(ex, ey, ep, Ed[0,:], nep=10)
es2, ed2, ec2 = cfc.beam2s(ex, ey, ep, Ed[1,:], nep=10)
es3, ed3, ec3 = cfc.beam2s(ex, ey, ep, Ed[2,:], nep=10)

# ----- Results --------------------------------------------------

print("a=")
print(a)
print("r=")
print(r)
print("es1=")
print(es1)
print("es2=")
print(es2)
print("es3=")
print(es3)

print("ed1=")
print(ed1)
print("ed2=")
print(ed2)
print("ed3=")
print(ed3)
It is possible to run the project by issuing the following command:
$ pipenv run fea_analysis.py
[[ 3.17100000e+08  0.00000000e+00  0.00000000e+00 -3.17100000e+08
 0.00000000e+00  0.00000000e+00]
 [ 0.00000000e+00  2.34266667e+06  3.51400000e+06  0.00000000e+00
 -2.34266667e+06  3.51400000e+06]

 ...

 [ 0.         -0.01992032]
 [ 0.         -0.01823785]]
ed3=
[[ 0.00000000e+00 -1.99203187e-02]
 [ 0.00000000e+00 -1.82378462e-02]
 [ 0.00000000e+00 -1.63679985e-02]
 [ 0.00000000e+00 -1.43341976e-02]
 [ 0.00000000e+00 -1.21598653e-02]
 [ 0.00000000e+00 -9.86842362e-03]
 [ 0.00000000e+00 -7.48329434e-03]
 [ 0.00000000e+00 -5.02789938e-03]
 [ 0.00000000e+00 -2.52566063e-03]
 [ 0.00000000e+00  1.73472348e-18]
 [ 0.00000000e+00  2.52566063e-03]]
Executing a shell in the created environment
It is also possible to create a shell with the created project environment. From this shell it is possible to examine the installed packaged using the pipenv graph:
$ pipenv shell
Launching subshell in virtual environment...
(myproj-jNDwD6z3) (base) $ pip list
Package           Version
----------------- -------
calfem-python     3.5.10
cycler            0.10.0
gmsh              4.8.4
kiwisolver        1.3.1
matplotlib        3.4.3
numpy             1.21.2
Pillow            8.3.1
pip               21.1.1
PyOpenGL          3.1.5
pyparsing         2.4.7
PyQt5             5.15.4
PyQt5-Qt5         5.15.2
PyQt5-sip         12.9.0
PyQtWebEngine     5.15.4
PyQtWebEngine-Qt5 5.15.2
python-dateutil   2.8.2
PyVTK             0.5.18
scipy             1.7.1
setuptools        56.0.0
six               1.16.0
visvis            1.13.0
wheel             0.36.2
When you don’t want to use the environment anymore just type exit and you are back in your previous environment.
Listing package dependencies
Using the pipenv graph it is also possible to list the dependencies of a project:
$ pipenv graph
calfem-python==3.5.10
    - gmsh [required: Any, installed: 4.8.4]
    - matplotlib [required: Any, installed: 3.4.3]
        - cycler [required: >=0.10, installed: 0.10.0]
        - six [required: Any, installed: 1.16.0]
        - kiwisolver [required: >=1.0.1, installed: 1.3.1]
        - numpy [required: >=1.16, installed: 1.21.2]
        - pillow [required: >=6.2.0, installed: 8.3.1]
        - pyparsing [required: >=2.2.1, installed: 2.4.7]
        - python-dateutil [required: >=2.7, installed: 2.8.2]
        - six [required: >=1.5, installed: 1.16.0]
    - numpy [required: Any, installed: 1.21.2]
    - pyqt5 [required: Any, installed: 5.15.4]
        - PyQt5-Qt5 [required: >=5.15, installed: 5.15.2]
        - PyQt5-sip [required: >=12.8,<13, installed: 12.9.0]
    - pyqtwebengine [required: Any, installed: 5.15.4]
        - PyQt5 [required: >=5.15.4, installed: 5.15.4]
        - PyQt5-Qt5 [required: >=5.15, installed: 5.15.2]
        - PyQt5-sip [required: >=12.8,<13, installed: 12.9.0]
        - PyQt5-sip [required: >=12.8,<13, installed: 12.9.0]
        - PyQtWebEngine-Qt5 [required: >=5.15, installed: 5.15.2]
    - pyvtk [required: Any, installed: 0.5.18]
        - six [required: Any, installed: 1.16.0]
    - scipy [required: Any, installed: 1.7.1]
        - numpy [required: >=1.16.5,<1.23.0, installed: 1.21.2]
    - visvis [required: Any, installed: 1.13.0]
        - numpy [required: Any, installed: 1.21.2]
        - pyOpenGl [required: Any, installed: 3.1.5]
This command does not require the project environment to be activated.
Updating packages in a project
Installed packages in a project can be updated using the pipenv update command in your project directory.
$ pipenv update --outdated
Locking...Building requirements...
Resolving dependencies...
Success!
Skipped Update of Package visvis: 1.13.0 installed,, 1.13.0 available.
Skipped Update of Package six: 1.16.0 installed,, 1.16.0 available.
Skipped Update of Package scipy: 1.7.1 installed,, 1.7.1 available.
Skipped Update of Package PyVTK: 0.5.18 installed,, 0.5.18 available.
Skipped Update of Package python-dateutil: 2.8.2 installed,, 2.8.2 available.
Skipped Update of Package PyQtWebEngine: 5.15.4 installed,, 5.15.4 available.
Skipped Update of Package PyQtWebEngine-Qt5: 5.15.2 installed,, 5.15.2 available.
Skipped Update of Package PyQt5: 5.15.4 installed,, 5.15.4 available.
Skipped Update of Package PyQt5-sip: 12.9.0 installed,, 12.9.0 available.
Skipped Update of Package PyQt5-Qt5: 5.15.2 installed,, 5.15.2 available.
Skipped Update of Package pyparsing: 2.4.7 installed,, 2.4.7 available.
Skipped Update of Package PyOpenGL: 3.1.5 installed,, 3.1.5 available.
Skipped Update of Package Pillow: 8.3.1 installed,, 8.3.1 available.
Skipped Update of Package numpy: 1.21.2 installed,, 1.21.2 available.
Skipped Update of Package matplotlib: 3.4.3 installed,, 3.4.3 available.
Skipped Update of Package kiwisolver: 1.3.1 installed,, 1.3.1 available.
Skipped Update of Package gmsh: 4.8.4 installed,, 4.8.4 available.
Skipped Update of Package cycler: 0.10.0 installed,, 0.10.0 available.
Skipped Update of Package calfem-python: 3.5.10 installed, 3.5.10 required (Unpinned in Pipfile), 3.5.10 available.
All packages are up to date!
How to use Conda environments
Anaconda is one of the largest commercial Python distributions. It has become a defacto standard for packaging Scientific Software and comes with it’s own packaging system, conda. If you are developing software using Anaconda the preferred way of installing software is by using the conda command line tool. If the packages are available in Anaconda’s package-repos they are tested to work together. It is often also not a good idea to mix conda and pip package-repositories.
In many situations it is often required to use both pip and conda packages. In these situations it is possible within Anaconda to create conda environments. These are derived from the builtin virtual environment tools in Python, but extended and made easier to use.
Creating a Anaconda environment
An anaconda environment is created using the conda create command. As shown in the following example:
$ conda create -n calfem-test
Collecting package metadata (current_repodata.json): done
Solving environment: done

## Package Plan ##

environment location: e:\anaconda3\envs\calfem-test


Proceed ([y]/n)? y

Preparing transaction: done
Verifying transaction: done
Executing transaction: done
#
# To activate this environment, use
#
#     $ conda activate calfem-test
#
# To deactivate an active environment, use
#
#     $ conda deactivate
This creates a new empty environment ready for use.
This environment doesn’t come with a Python interpreter, so that has to be installed by using:
$ conda install python
This will install the latest Python interpreter in the new environment
It is also possible to do this in a single command:
$ conda create -n calfem-test python
It is also possible to specify more packages to install by adding them on the command line.
The version of Python or packages can be specified by using an equal sign and a version number as shown below:
$ conda create -n calfem-test python=3.8
This will create an environment with the latest version of Python 3.8.
Activating and deactivating Anaconda environments
To use an environment it has be activated. Activating an environment is done using the conda activate command. The command takes name of the environment as an additional parameter. In the following example we activate the previously created environment:
$ conda activate calfem-test

(calfem-test) $
This will setup all the search paths for the environment. The prompt is also modified to indicate which environment is activate.
Please note that creating an empty environment does not come with an Python interpreter by default.
An environment can be deactivate by using the conda deactivate command:
(calfem-test) $ conda deactivate
(base) $
No environment name is required for deactivating an environment.
Removing an environment
Removing a created environment is done using the conda env remove command:
conda env remove -n calfem-test
Remove all packages in environment e:anaconda3envscalfem-test:
(base) $ conda remove -n calfem-test

Remove all packages in environment e:\anaconda3\envs\calfem-test:
...
Cloning an existing environment
An exact copy of an existing environment can be created using the –clone option:
(base) $ conda create -n calfem-dev-2 --clone calfem-test
Source:      e:\anaconda3\envs\calfem-dev
Destination: e:\anaconda3\envs\calfem-dev-2
Packages: 158
Files: 13121
Exporting an Anaconda environment
You can list all packages and their versions using the conda list command:
(base) $ conda list calfem-dev --explicit
# This file may be used to create an environment using:
# $ conda create --name <env> --file <this file>
# platform: win-64
@EXPLICIT
https://repo.anaconda.com/pkgs/main/win-64/ca-certificates-2021.7.5-haa95532_1.conda
https://repo.anaconda.com/pkgs/main/noarch/tzdata-2021a-h5d7bf9c_0.conda
https://repo.anaconda.com/pkgs/main/noarch/pyopenssl-20.0.1-pyhd3eb1b0_1.conda
...
https://repo.anaconda.com/pkgs/main/noarch/urllib3-1.26.6-pyhd3eb1b0_1.conda
https://repo.anaconda.com/pkgs/main/noarch/requests-2.26.0-pyhd3eb1b0_0.conda
https://repo.anaconda.com/pkgs/main/noarch/sphinx-4.0.2-pyhd3eb1b0_0.conda
This list can also be saved to a file that then can be used to recreate the environment.
(base) $ conda list calfem-dev --explicit > spec-file.txt
Using this file it is now possible to create an environmnet with the exact set of packages.
(base) conda create --name calfem-dev-3 --file spec-file.txt
Preparing transaction: done
Verifying transaction: done
Executing transaction:
...
Conda and pip
Pip can be used to install software in a conda environment. However, package information for Pip-packages are not exported using the conda list command. Pip-packages must be handled separately for example using the pip freeze command.
If possible it is always better to use the packages that are available in the conda repositories instead of using packages from the pip-package repository.
Using conda environments in Jupyter Notebooks
If you want to use a conda environment in a Jupyter Notebook it has to be added to the list of availble kernels. This can be done by using the ipykernel package. This package is installed with the following commands:
(base) $ conda activate your-environment
(your-environment) $ conda install ipykernel
(base) $ conda deactivate
It is now possible to switch environment from within a jupyter-notebook started from the base-environment:
(base) $ jupyter-notebook
It is now possible to create a new notebook using the environment by selecting New / Python [conda env:your-environment]
Python extra material
Installing py5
py5 is a package for creative programming in Python. The package has complicated dependencies, so it is recommended to install the package in a Python environment.
Creating a environment for py5
Open an Anaconda prompt and run the following commands::
$ conda create -n py5 python=3.10
Collecting package metadata (current_repodata.json): done
Solving environment: done

...

xz                 pkgs/main/win-64::xz-5.2.5-h8cc25b3_1
zlib               pkgs/main/win-64::zlib-1.2.12-h8cc25b3_2


Proceed ([y]/n)?
Press enter to accept the installation settings.
Installing py5
Before installing py5 we have to activate the previously environment::
$ conda activate py5
We can now install py5 using pip::
$ pip install py5
Collecting py5
...
Installing collected packages: wcwidth, pywin32, pytz, pure-eval, pickleshare, line-profiler, executing, backcall, widgetsnbextension, urllib3, traitlets, tornado, toml, stackprinter, six, pyzmq, pyparsing, pygments, pycodestyle, psutil, prompt-toolkit, pillow, parso, numpy, nest-asyncio, jupyterlab-widgets, jpype1, idna, entrypoints, decorator, debugpy, colorama, charset-normalizer, requests, python-dateutil, packaging, matplotlib-inline, jupyter-core, jedi, autopep8, asttokens, stack-data, pandas, jupyter-client, ipython, ipykernel, ipywidgets, py5
Next, we need to install the Java runtime::
$ pip install install-jdk
Collecting install-jdk
  Using cached install_jdk-0.3.0-py3-none-any.whl
Installing collected packages: install-jdk
Successfully installed install-jdk-0.3.0
$ python -c "import jdk; print('Java installed to', jdk.install('17'))"
For this to work you need to set the JAVA_HOME environment variable to the location returned from the last command. Restart the terminal and reactivate the py5 environment to run the examples.
For more informaton on installing py5, see: